Here are the news in version 2.9.0
Web Updates [v. 2.9.0]

Speeding up and simplifying the work of those who plan tasks has always been one of our biggest goals!
Therefore, starting from this version, an important feature is coming just in this regard…
Now you can create tasks even faster by simply double-clicking on the desired time slot in the calendar module!
Once positioned in any view of the Calendar module (except for that “Grid”, as it does not provide a time display), identified the time interval within which you want to program the intervention, by double-clicking on it will automatically open the popup of creation new task, with date and time of start and end obviously pre-filled based on the point where you made the double click*.
*The start time will be exactly the one in correspondence of the made click for the “Day” and “Week” views, while it will be the current one (approximate to the quarter of an hour) in case of creation by double-clicking for the “Month” and “Task plan” views. The pre-filled end time will always be one hour after the start time.
After the creation process, the task will be automatically placed in the time slot identified within the calendar, allowing a greater immediacy and a considerable saving of time during the planning phase.
(fig 1.0)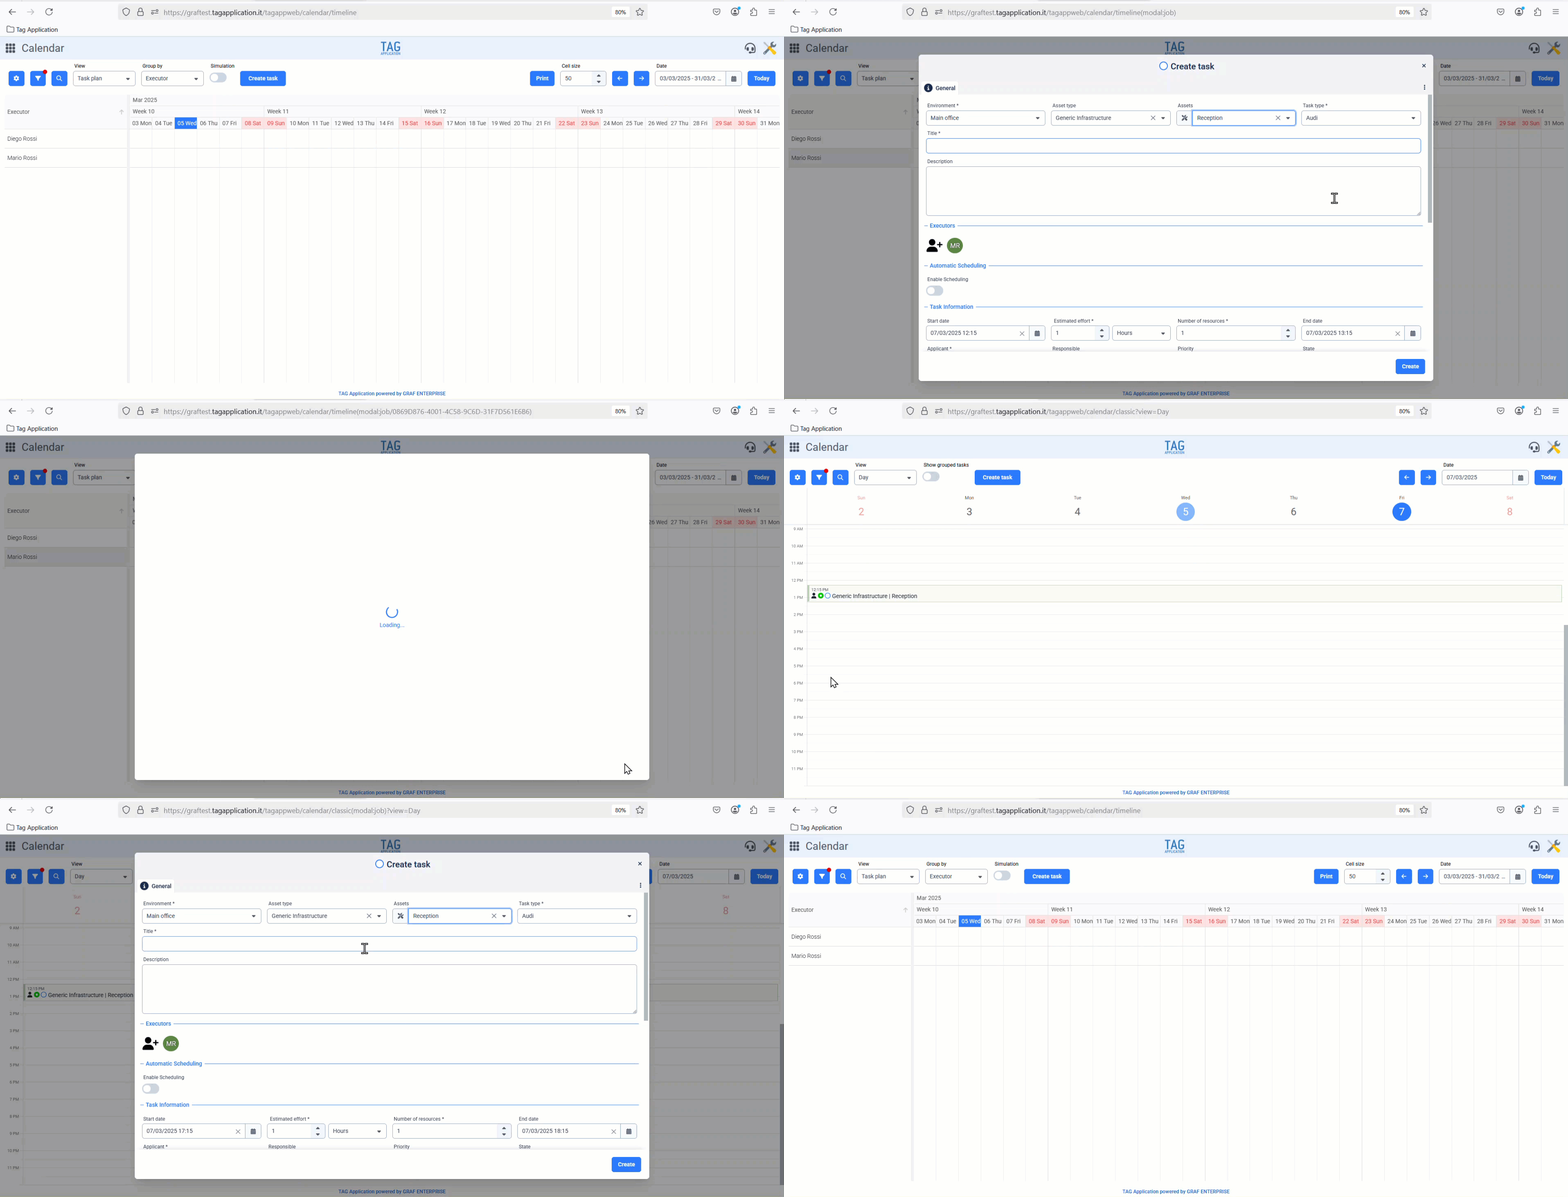

Immerse yourself in the data with a full-screen consultation view?
Con la nuova versione potrai fare anche questo!
With the new version you can do this too!
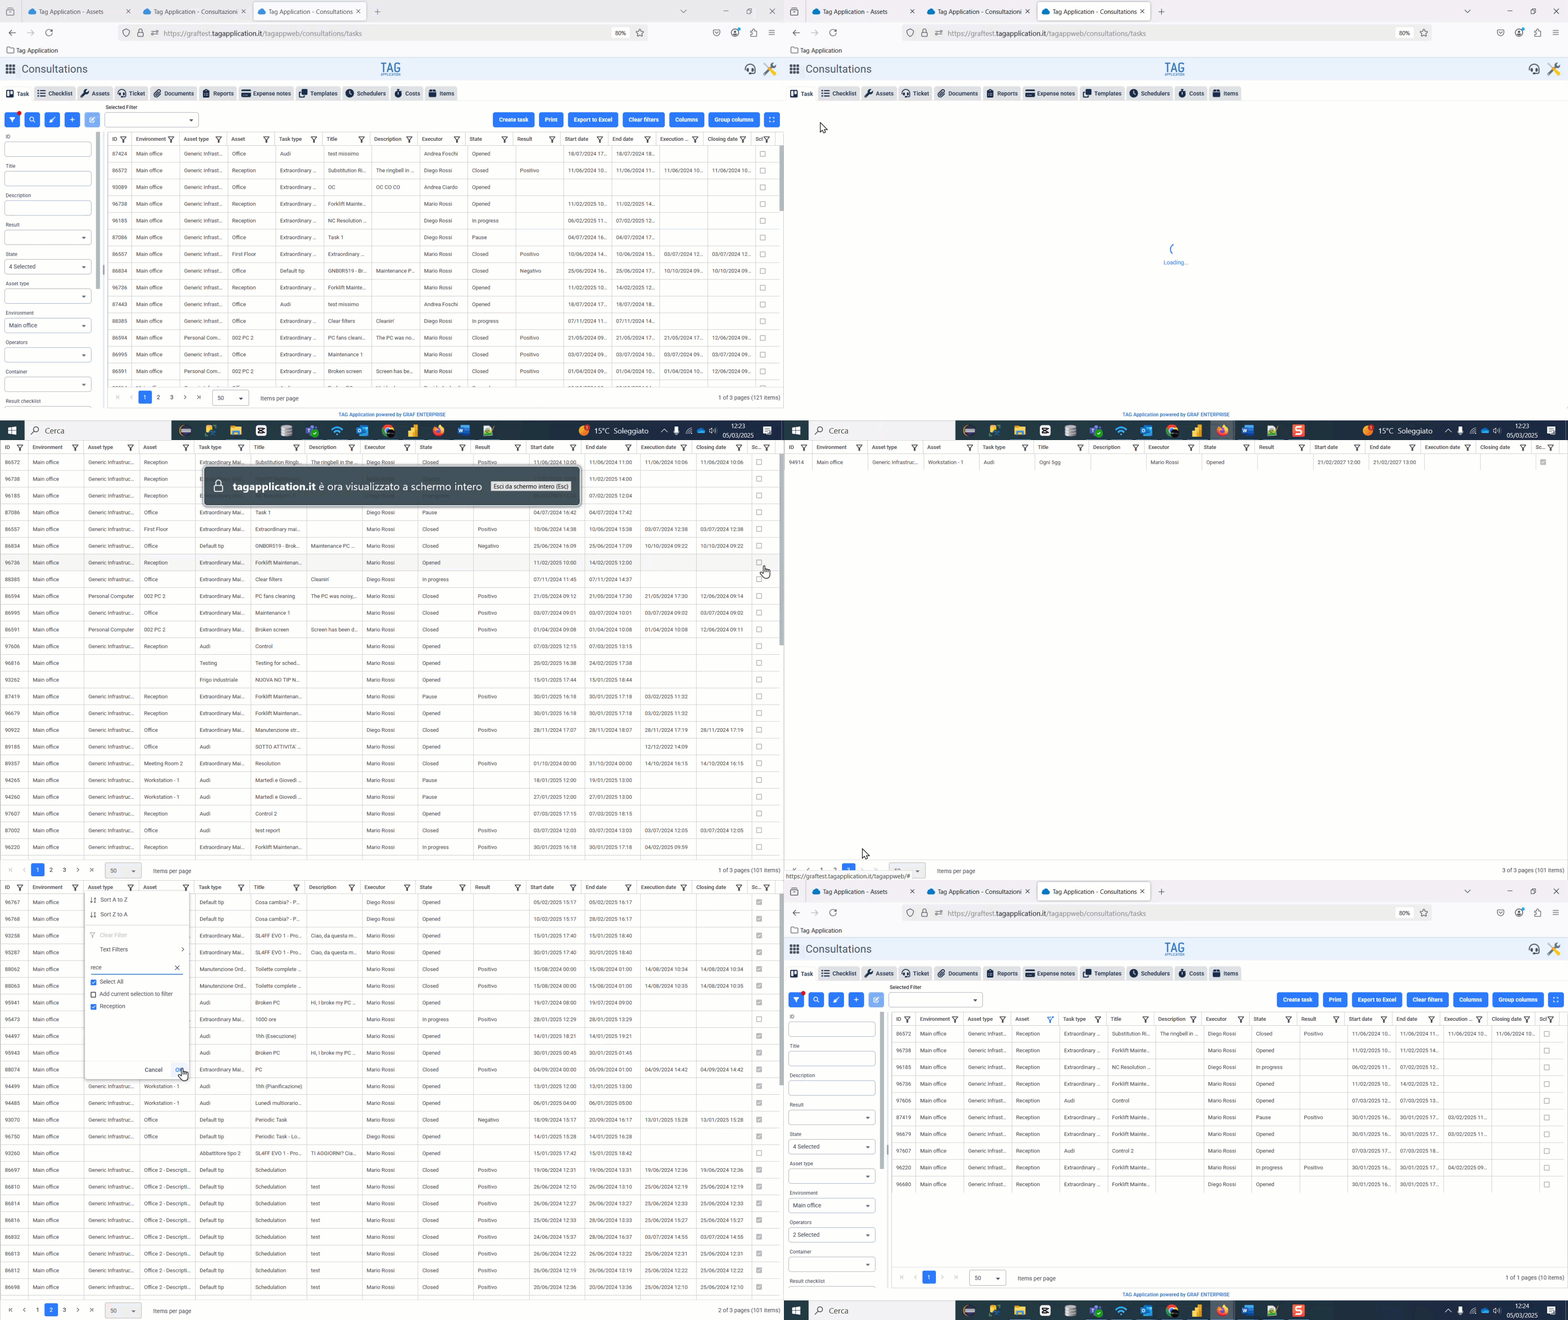
Once a search of any type from the Consultations module, in fact, by clicking on the last blue button at the top right, will be set to “Full screen” mode.
From here, in addition to being able to make more filters of the columns, it will be possible to have a much wider view than the classic one.
In this way to consult and find what you want becomes much more simple, fast and also fun!!
(fig 2.0)

Open the preview of uploaded PDF documents and share them in a flash directly via TAG Application?
Easy! With the new version you just need to locate the uploaded file that you want to share, Click on the tile to open the preview detail and use the integrated share function to send the PDF directly through the TAG Application interface.
Through this new modus operandi, the click on the tile will no longer trigger the automatic download of the file, But will open a detail in which you will have both the preview and a range of convenient additional features such as download and quick sharing.
(fig 3.0)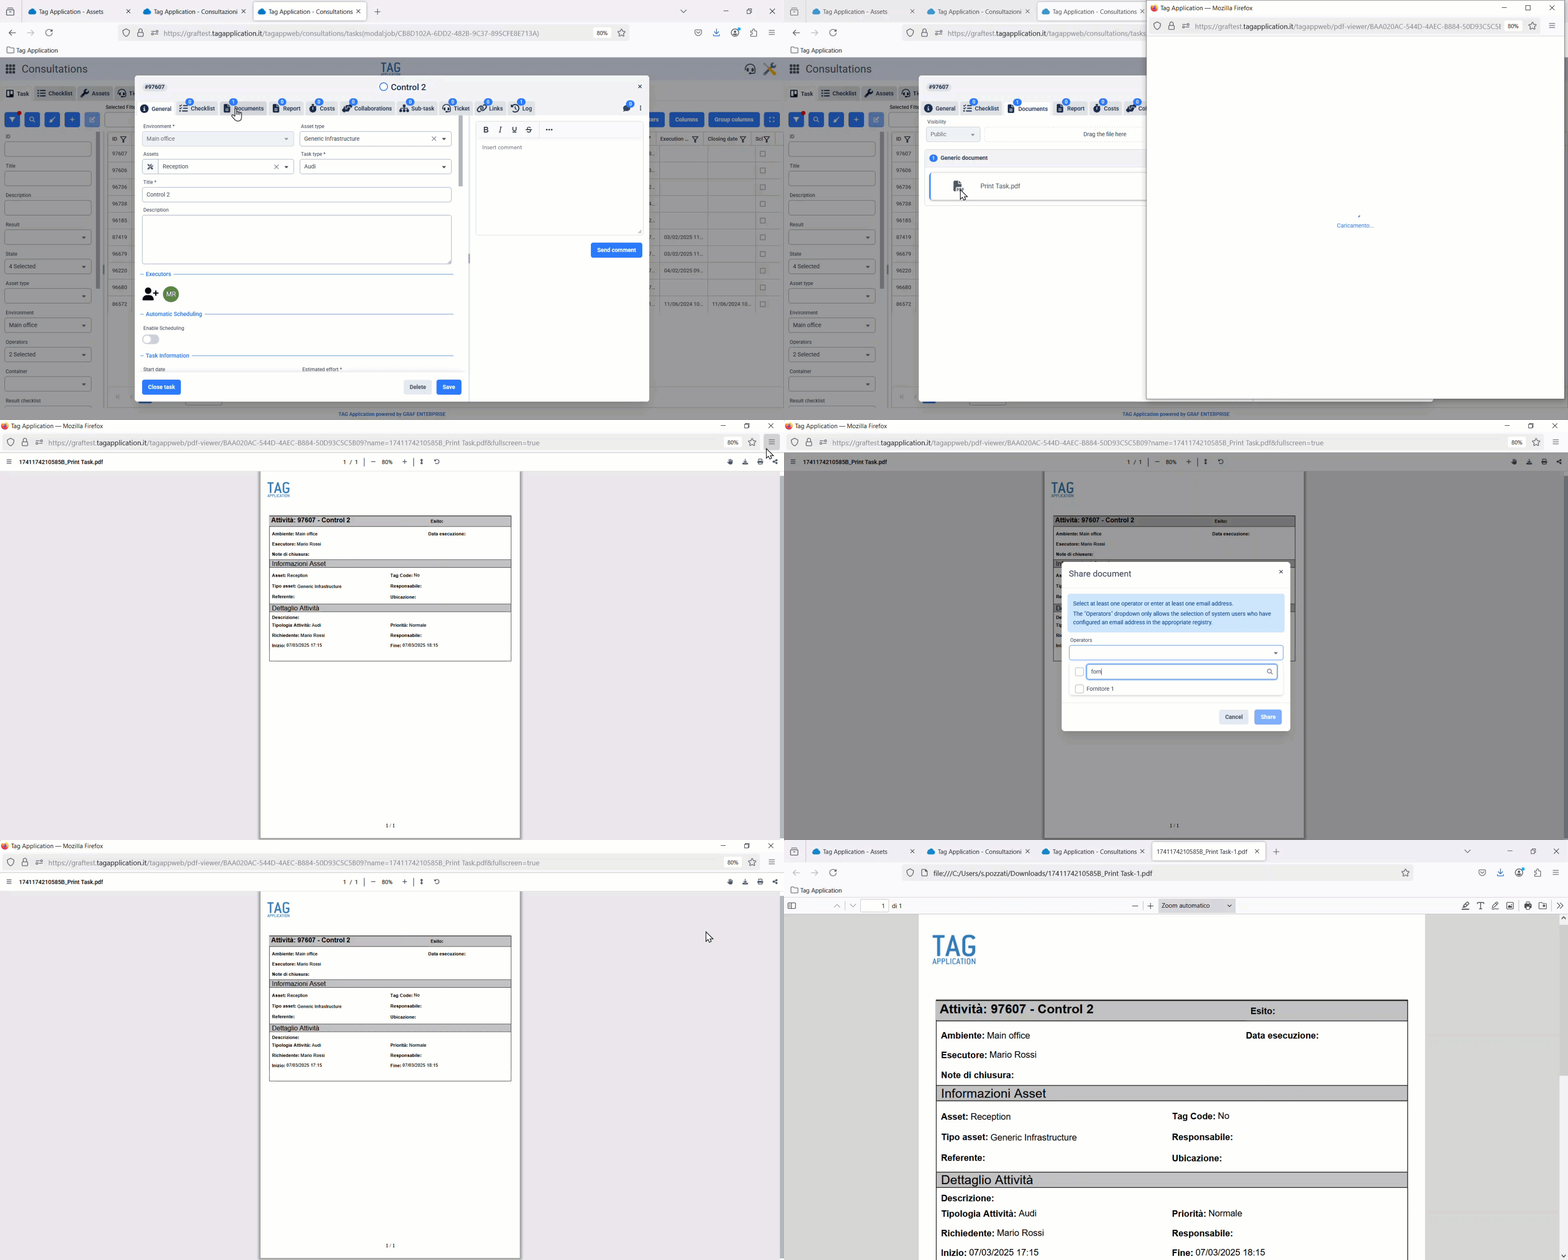
Is it difficult to consult large amounts of data?
True, you often find yourself researching huge historians, getting so many results that it is easy to get lost.
In addition, the system may become overloaded in these cases, indicating slowness in the processing of searches. That’s why there are “pre-filters“! Convenient side filters to the tables that allow you to make a first creaming of the data.
These filters are therefore very important and with the new version they have been extended in the section “Ticket” of the module Consultations!
Now you can pre-filter tickets for:
– IDThanks to this considerable expansion of the range of filters, searches will undoubtedly be more punctual, fast and effective now!
(fig 4.0)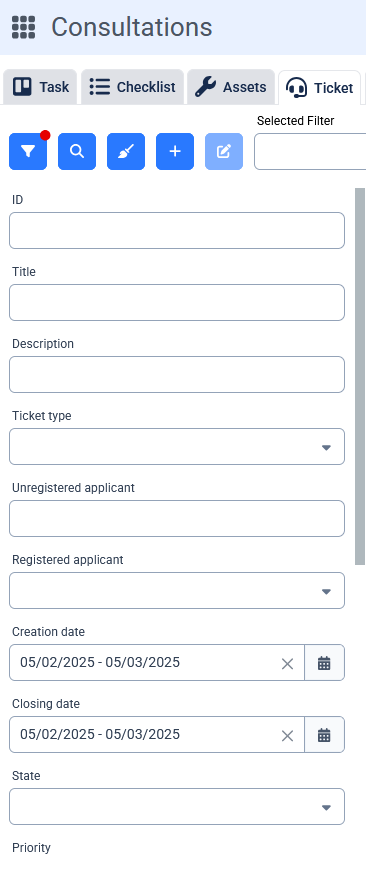

You want to open a ticket on an asset for which you do not know the environment?
If you have more details, with the new version you can do it!
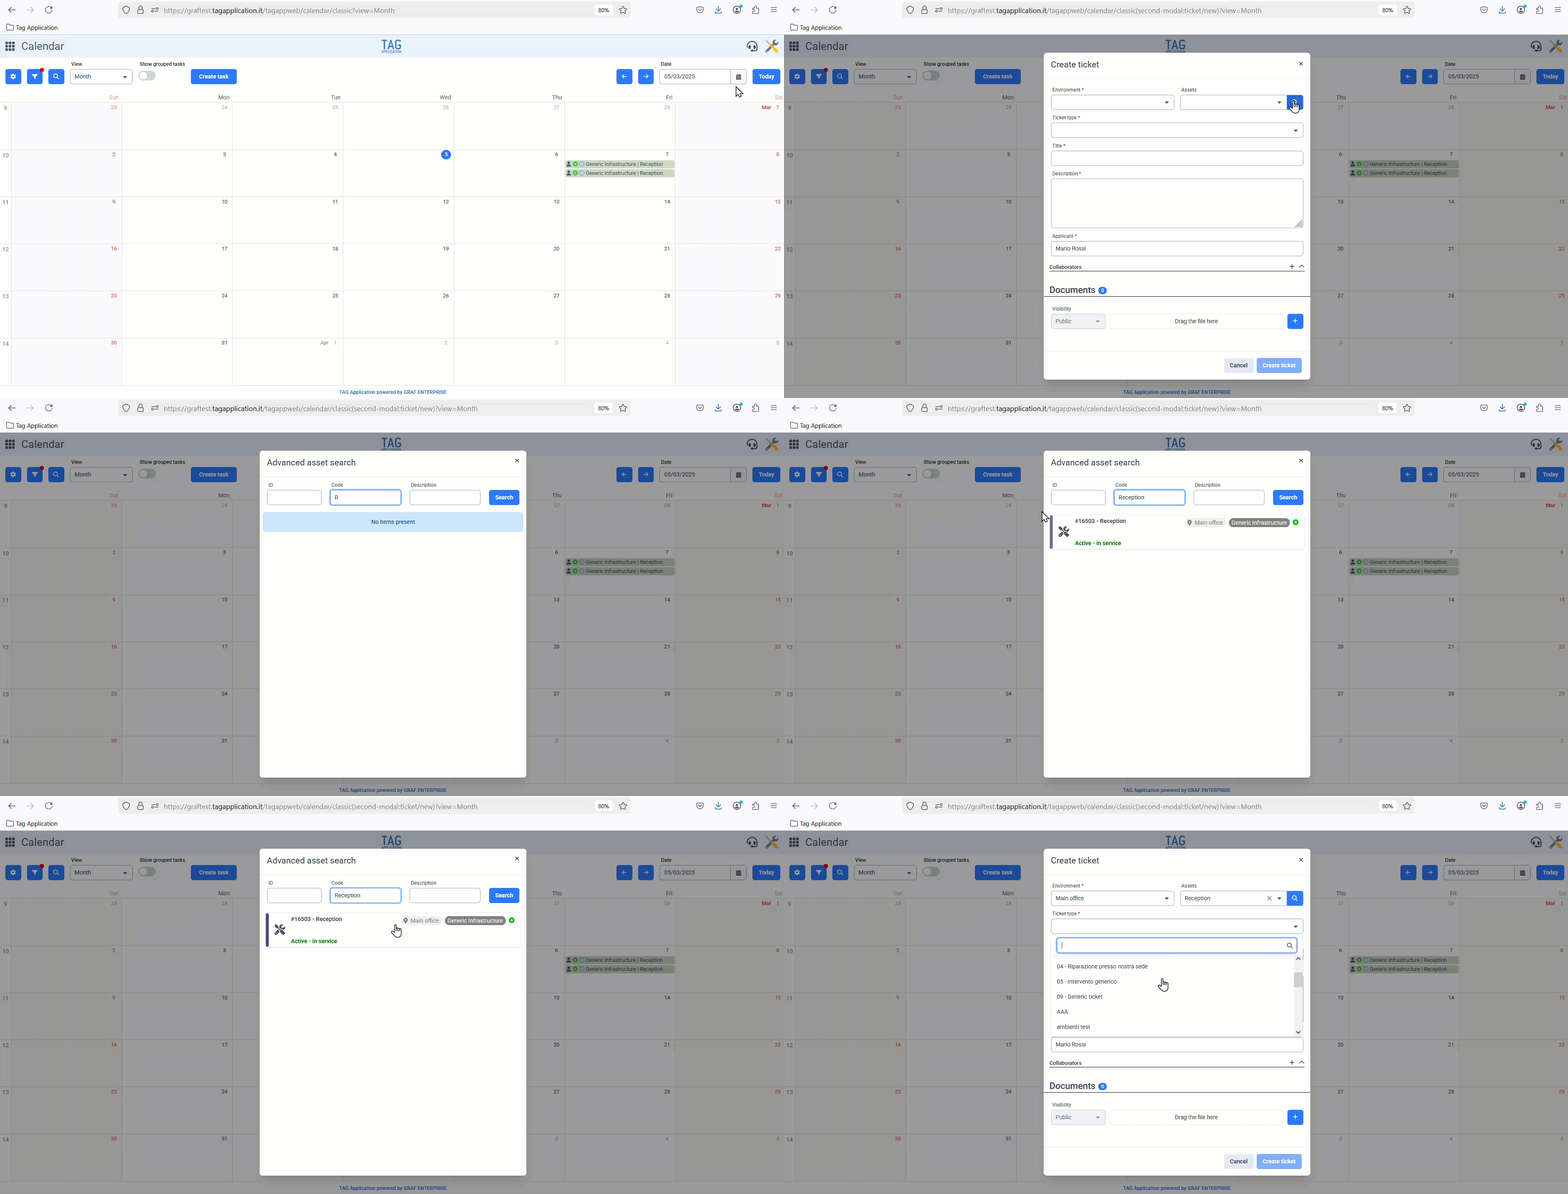
The creation of tickets via the new “Advanced search” is now available.
The “Advanced Search” is an asset search mode that can be used directly from the interface to create a new ticket, through the magnifying glass icon located right next to the “Assets” field.
When the magnifying glass is clicked, the system will allow the asset search in all environments for which you have visibility, with the possibility of searching by ID, Code and Description.
Once the search is launched using the appropriate button, the system will propose the results as a tile, with inside the main details of the asset to which they refer.
Once the desired asset is located, just click on it to set it automatically in the new ticket creation screen where you will be immediately redirected (and where the environment will also be pre-populated accordingly).
After that, you will only have to complete the required fields and confirm the creation of the ticket, which you will also successfully manage without initially knowing the environment of the set asset!
(fig 5.0)