Here are the news in version 1.90.0
Would you like to find out more about TAG Application and have more information?

Monitoring – Temporarily disabling notifications from a gateway
In the company, it often happens to carry out tests or undergo interventions, so that false alarms could occur?
Maybe why are sent useless and misleading notifications that it would be convenient to be able to disable when necessary?
Now TAG Application has the solution: with the new version, you can disable notifications of a gateway for a certain time range, both for those on missed transmissions and for those on alarms configured in the section dedicated to the different variables linked.
With the new functionality, modifying and configuring your gateways in detail will be easy and intuitive, convenient and fast.
The gateway page will be expanded, allowing new, punctual and detailed configurations.
By accessing the module Settings (section Monitoring – Gateway), after selecting the chosen gateway, you will open a page with three sub-sections:
• General
• Gateway notifications
• Linked variable notifications
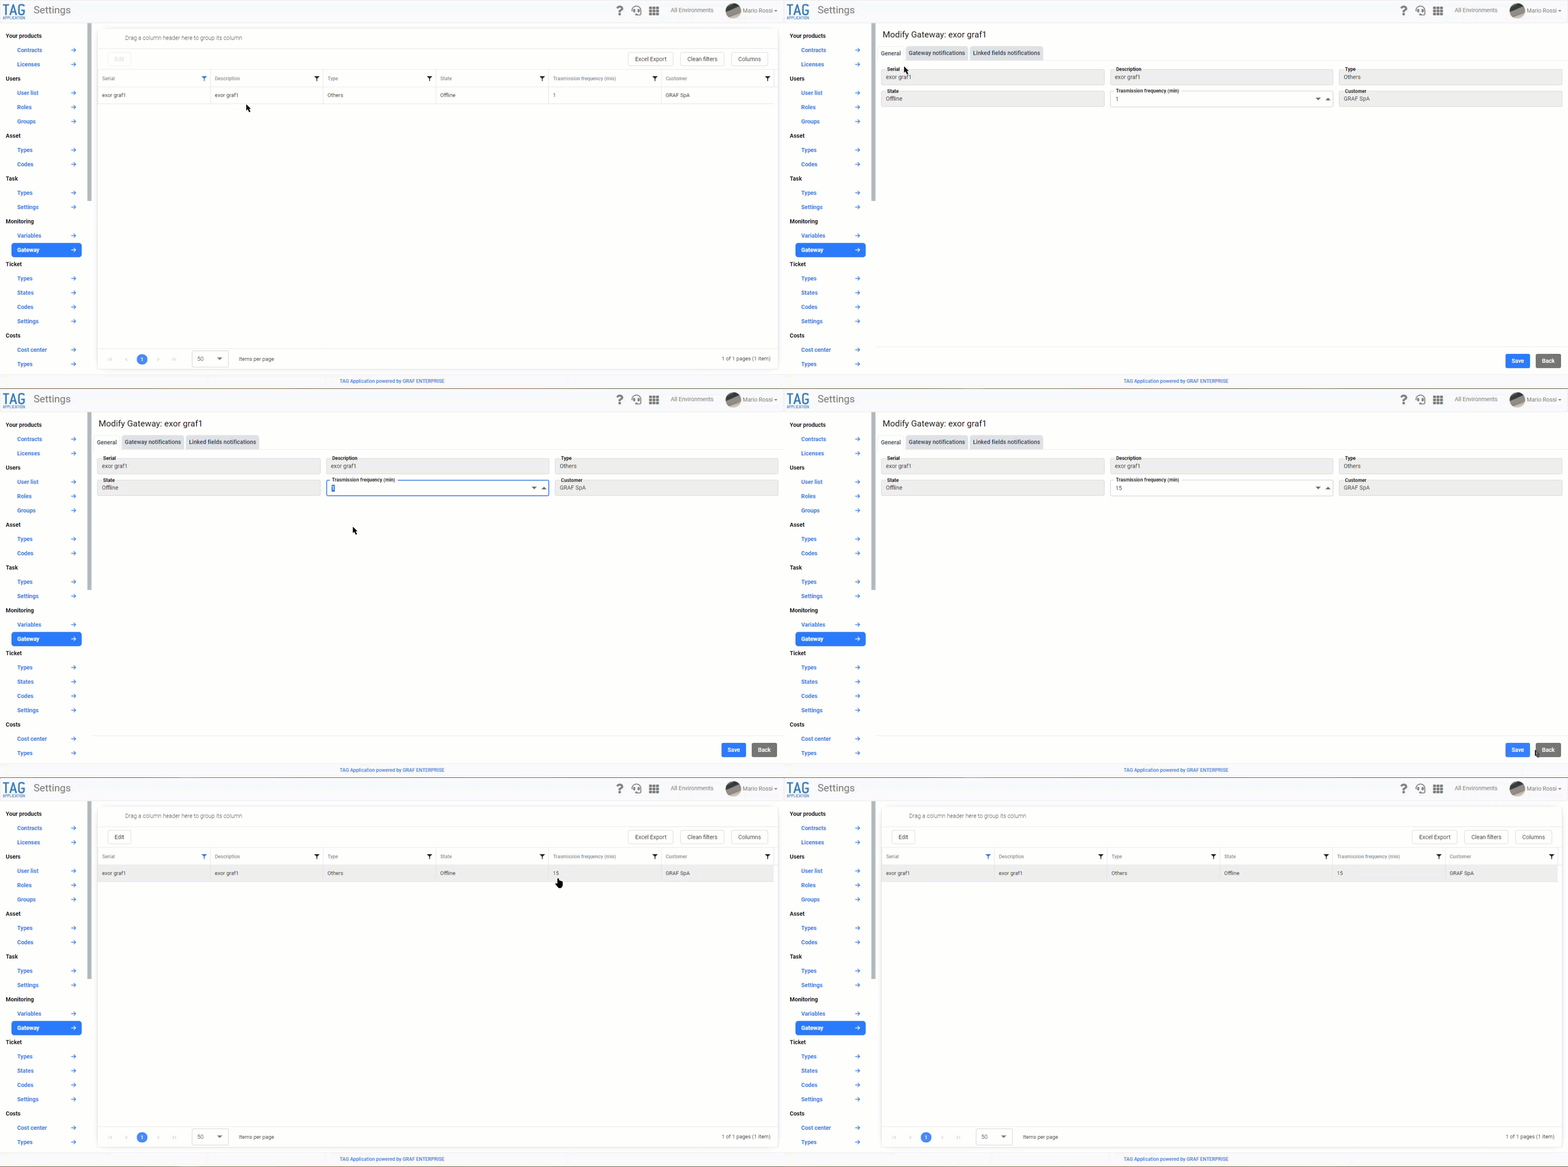
In the general section, as already allowed in previous versions, you will see the details of the selected gateway. All information will be accessible in read-only, with the exception of transmission frequency, which can be modified according to needs thanks to a new development in the release phase with the upcoming version.
(fig 1.0)
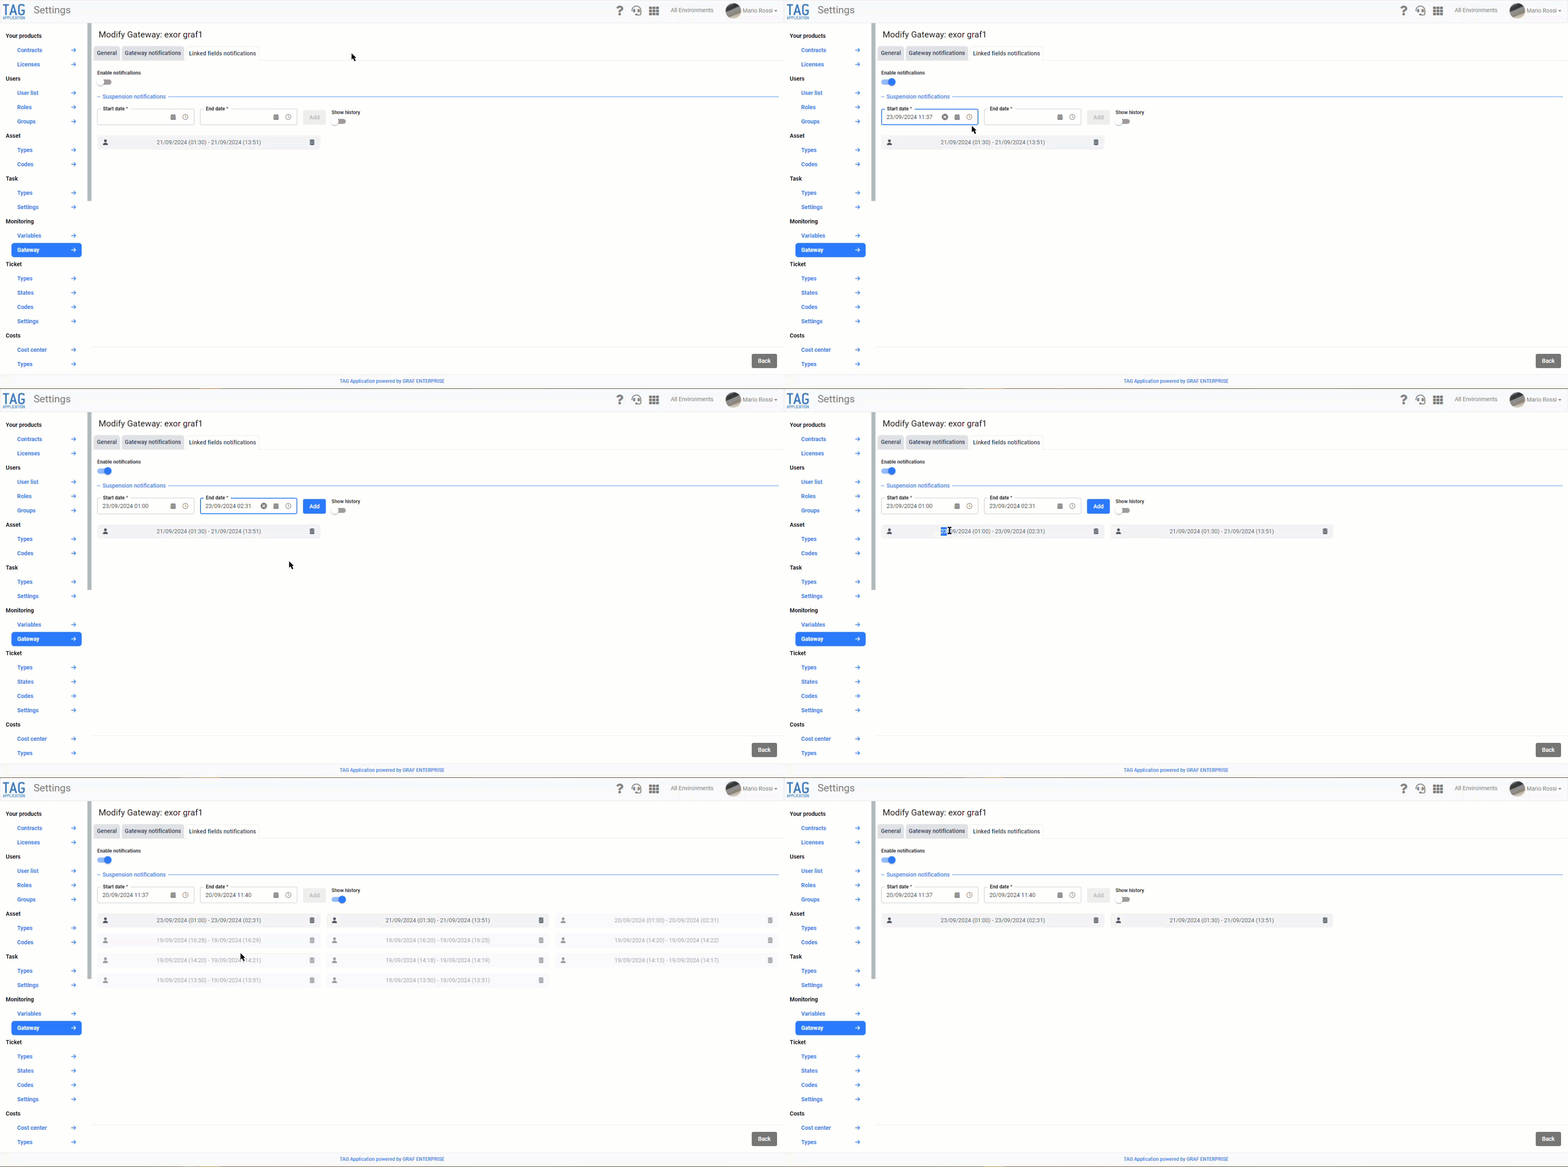
By switching to gateway notifications, instead, in addition to configuring the number of missed transmissions for notification when the gateway is offline, it will now finally become possible to set a time value within which no notification will be sent.
The field “Posticipa notifica gateway offline“, in case the gateway is offline, will therefore allow to indicate for how many hours no notification after the first failure of transmission. (fig 1.1)
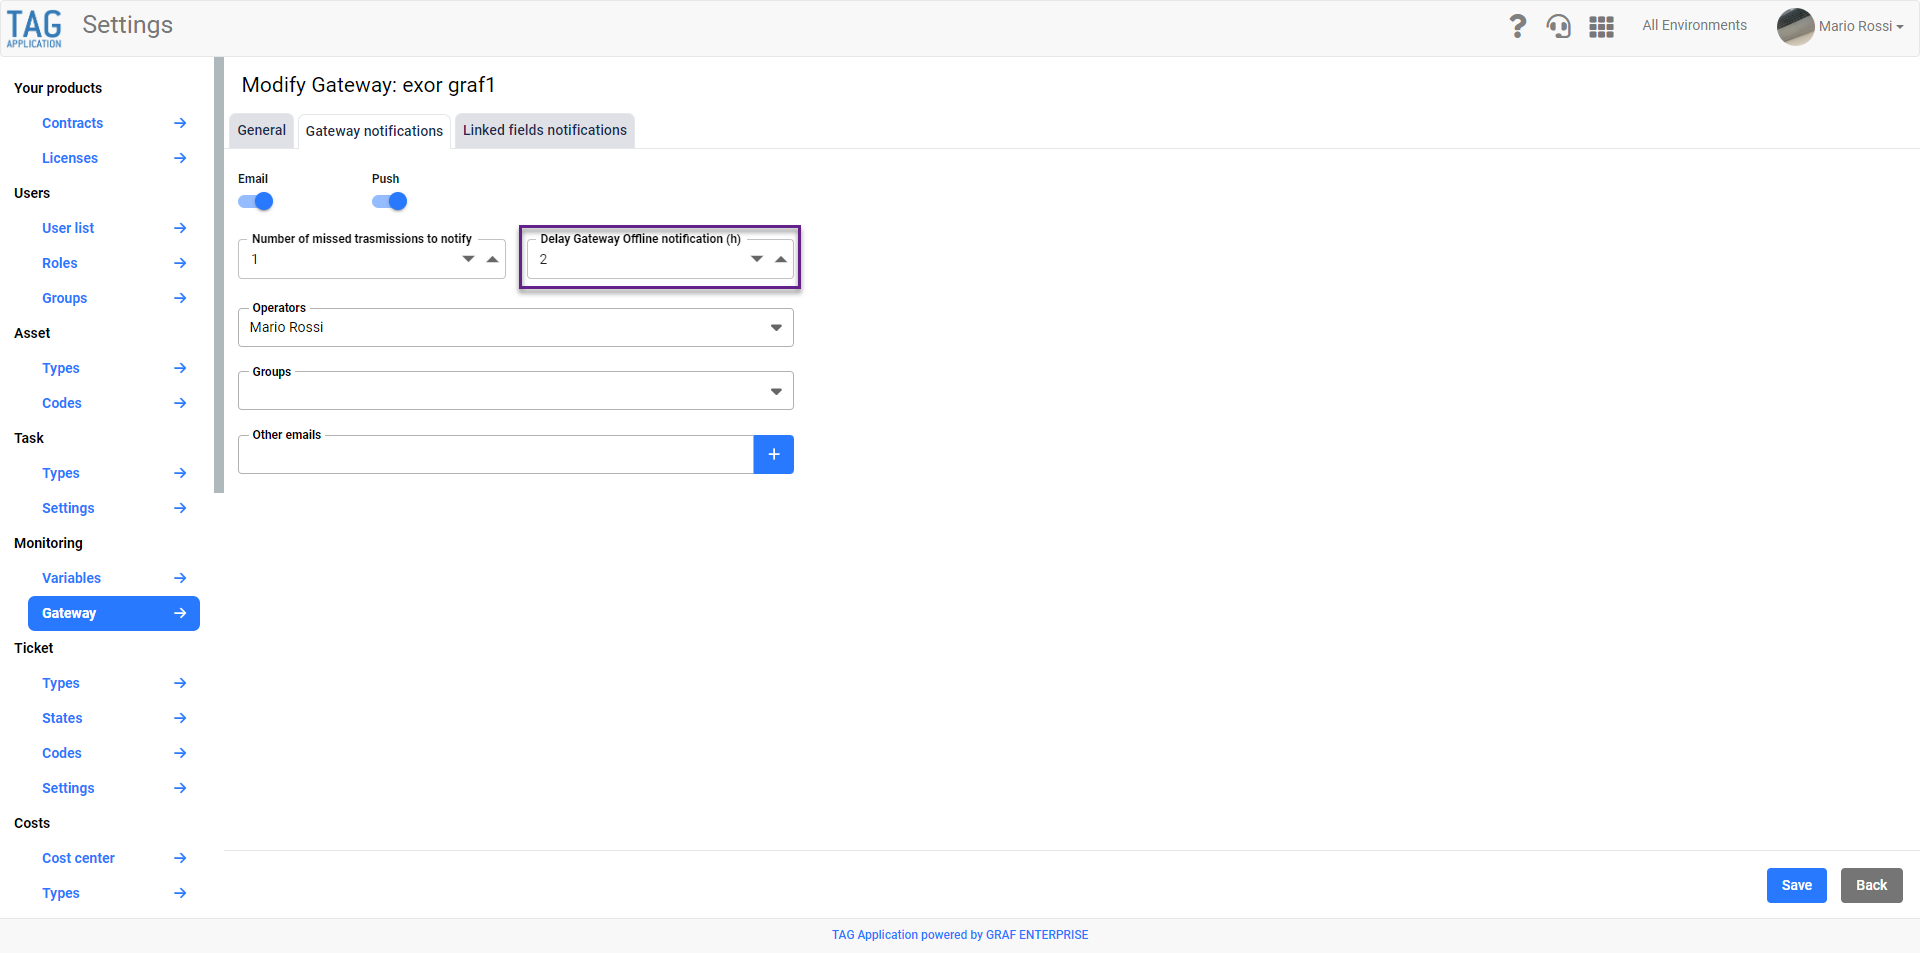
If the hours indicated in the field are past, the gateway will still be offline, also according to the value entered in “Number of missed transmissions for notification”, the system will send a new notification of failure to transmit and, After that, it will resume counting the time value in which to silence.
In the last section, as its name suggests, it will be possible to control all notifications of variables linked to the selected gateway.
First, through the convenient “Activate notifications” switch, you can decide to activate or deactivate all the notifications configured on the variables linked to the gateway that you are considering.
Then, just below, under the item “Suspend notifications“, you can specify time ranges within which, precisely, to suspend the sending of notifications specially configured in the dedicated section of each variable.
By filling in “Start date”, “End date” and pressing “Add” a line will be displayed, obviously related to the suspension period, with the following details/buttons:
• Pause interval creator (can be displayed by positioning on the man icon via tooltip)
• Start date and end date of the suspension interval
• Trash can, to eliminate the suspension interval
Clearly it will not be possible to enter neither past time ranges nor already entered time ranges.
After the preset pause interval, in addition to automatic reactivation of notifications, it will happen that the line representing the interval will disappear, as precisely passed and no longer scheduled.
To view the history of suspensions, simply activate the “Show history” switch.
In this way the past intervals will also be displayed, always in the form of rows with all the details, with the only difference obviously that, being history of which must remain track, it will not be possible to delete them in any way. (fig 1.2)

Calendar – New time views
Planning activities is essential for any type of business.
That’s why the TAG Application team works every day to develop ever more efficient and cutting-edge tools, which allow users to manage any type of activity quickly and easily.
In order to manage the tasks over time, the Calendar module has been greatly enhanced, thanks to a graphical and logical revision of all the time views available.
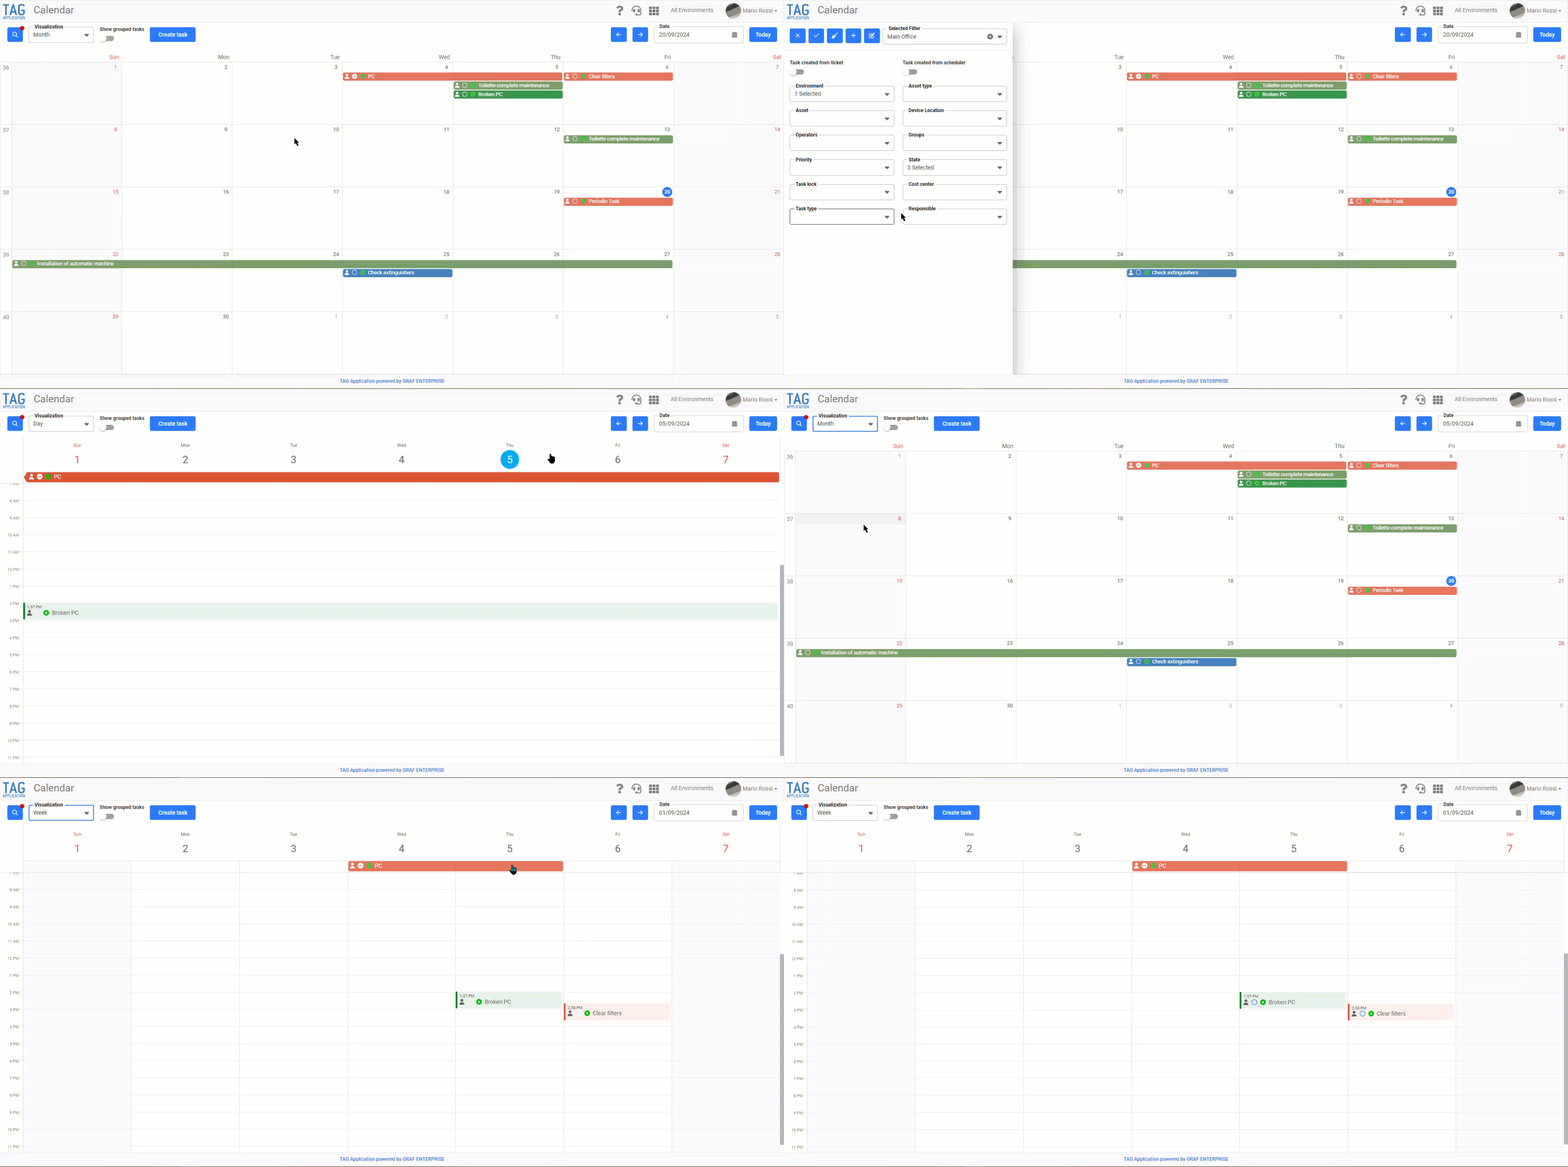
With the migration to a very recent technology, you can now use day, week and month views in a totally new version, more fluid, fast and optimized.
Among the major news, it will now be possible:
• Take advantage of the new filter panel with new information and fully synchronized with the activity plan.
• Decide whether to display grouped subtasks and scheduled tasks within the relative parent/schedule task by using the “Show grouped tasks” switch.
• Access a specific week or day by simply clicking. In the month view, clicking on the number of the week will access the selected week in the homonymous view, and clicking on the number of the day will access the selected day in the homonymous view. Similarly, in the week view, clicking on the day number will access the selected day in the same view.
• Navigate in time simply by using the blue arrows or the calendar component located at the top right of the page.
In addition to these, you will certainly notice a better speed and fluidity of navigation, the modernized graphics and greater simplicity and comfort in daily use.
(fig 2.0)

Asset – Viewing and sorting of columns persisted
It is often necessary to consult information related to activities, documentation and monitoring directly from a specific asset, in order to focus directly on the infrastructure of interest.
For convenience, in order to search precisely any entity you intend to find, almost always use the searches through useful columns of grids.
These columns, easily reordered and displayed as needed, in previous versions had configured a system order, modifiable yes, but only saved in the module Consultations.
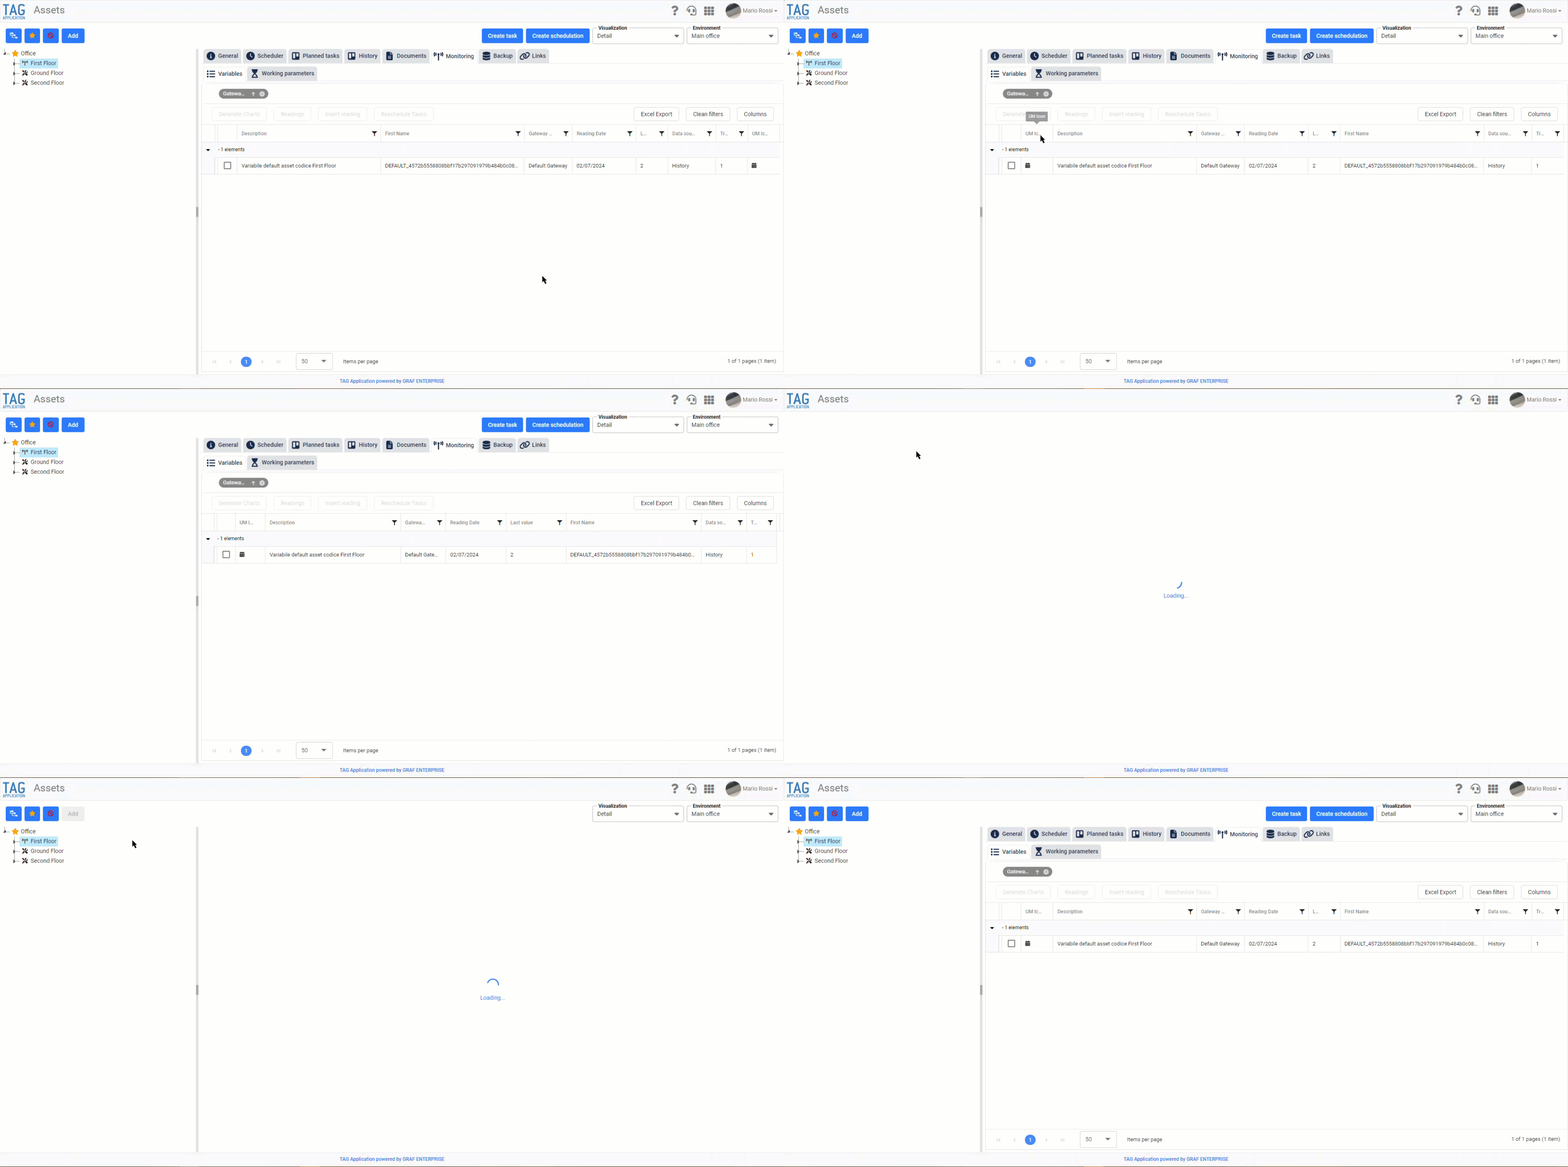
With the new version, however, important news are finally coming for both the Asset module and the Monitoring module: within an asset, in fact, configuring a specific sorting of columns, whatever grid you are referring to, this will be persisted and valid for every infrastructure.
Accessing the specific grid of any asset, therefore, will automatically apply the sorting and display of columns as last configured.
This logic, which is crucial for speeding up the work of users, has also been applied in the Monitoring module: the grid of variables is synchronized with that of the Asset module. Any changes to the display and sorting of columns will be persisted bilaterally, whether made by one module or by the other.
(fig 3.0)

Consultations – Printouts of rearranged tasks
Saving a convenient PDF file of the activities carried out in a certain period or a specific type is very useful for those who must produce timely reports.
In previous versions of the Consultations module, it was already possible to obtain these printable documents, but without the possibility of ordering them at will.
With the new version, it finally becomes possible!
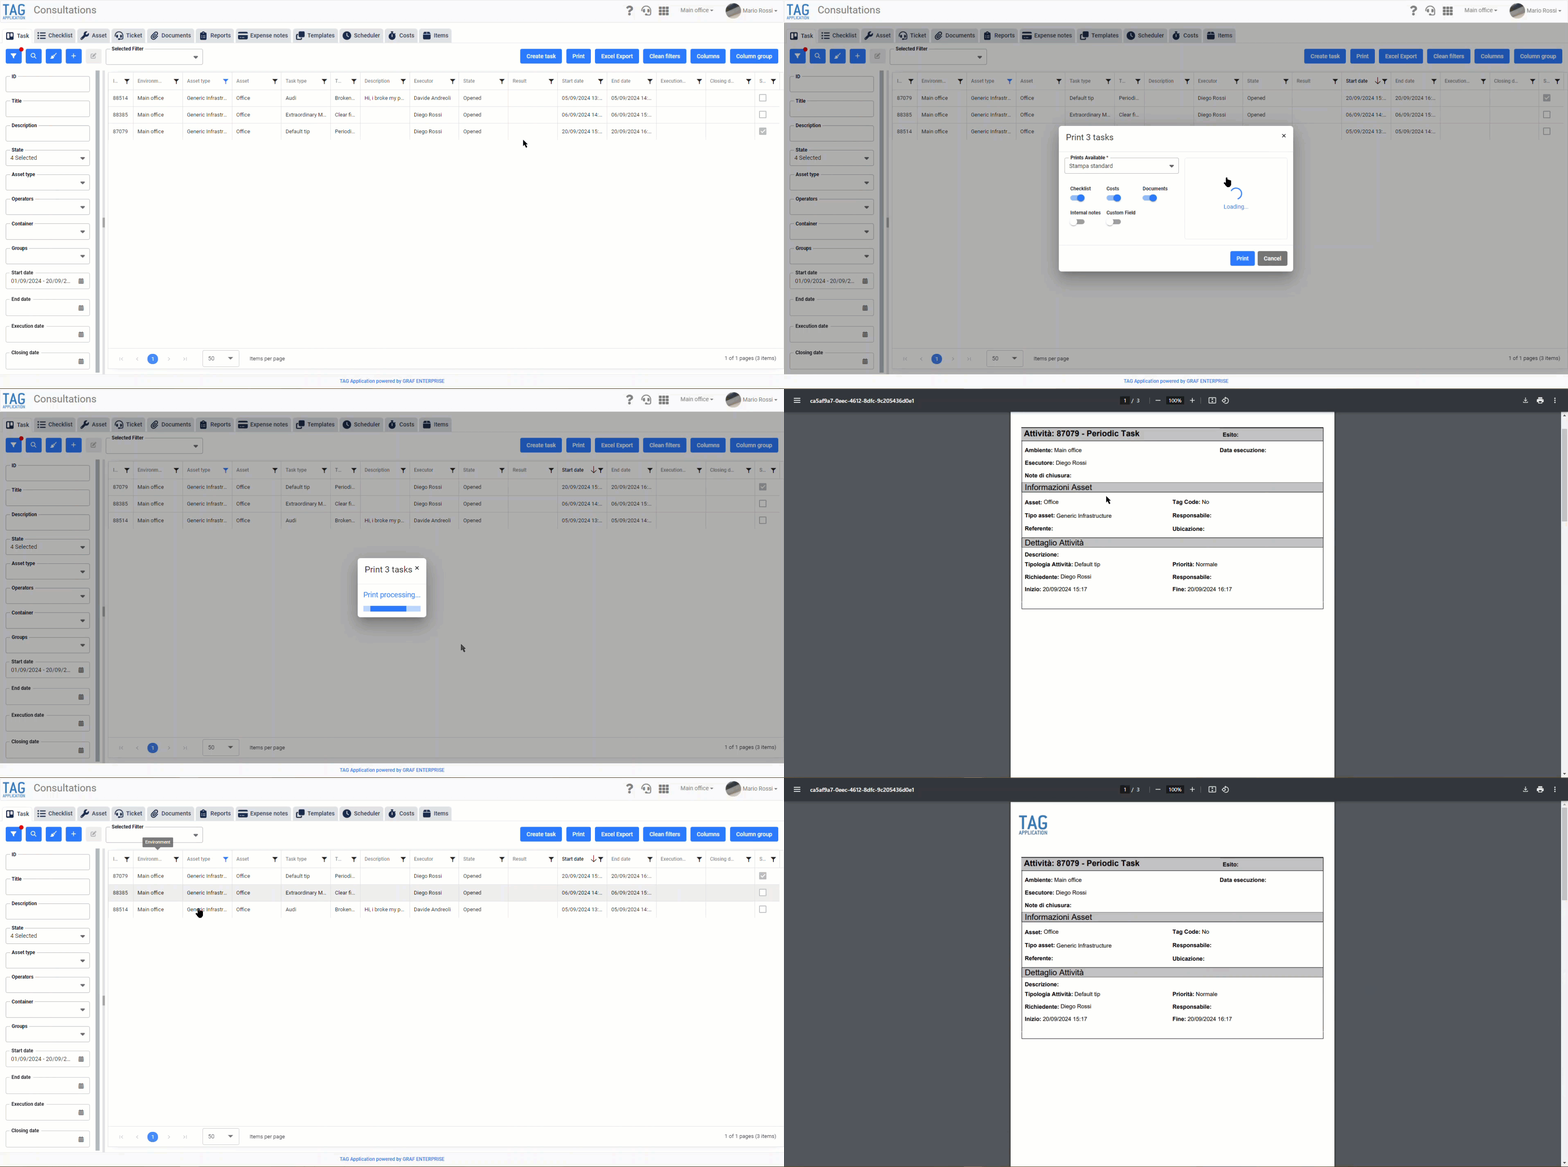
Now you can finally apply filters and sort on any column, launch the print command and get the tasks in the PDF file sorted exactly as displayed in the grid.
All in an intuitive and transparent way, to obtain punctual and orderly results, to share or print on paper.
(fig 4.0)
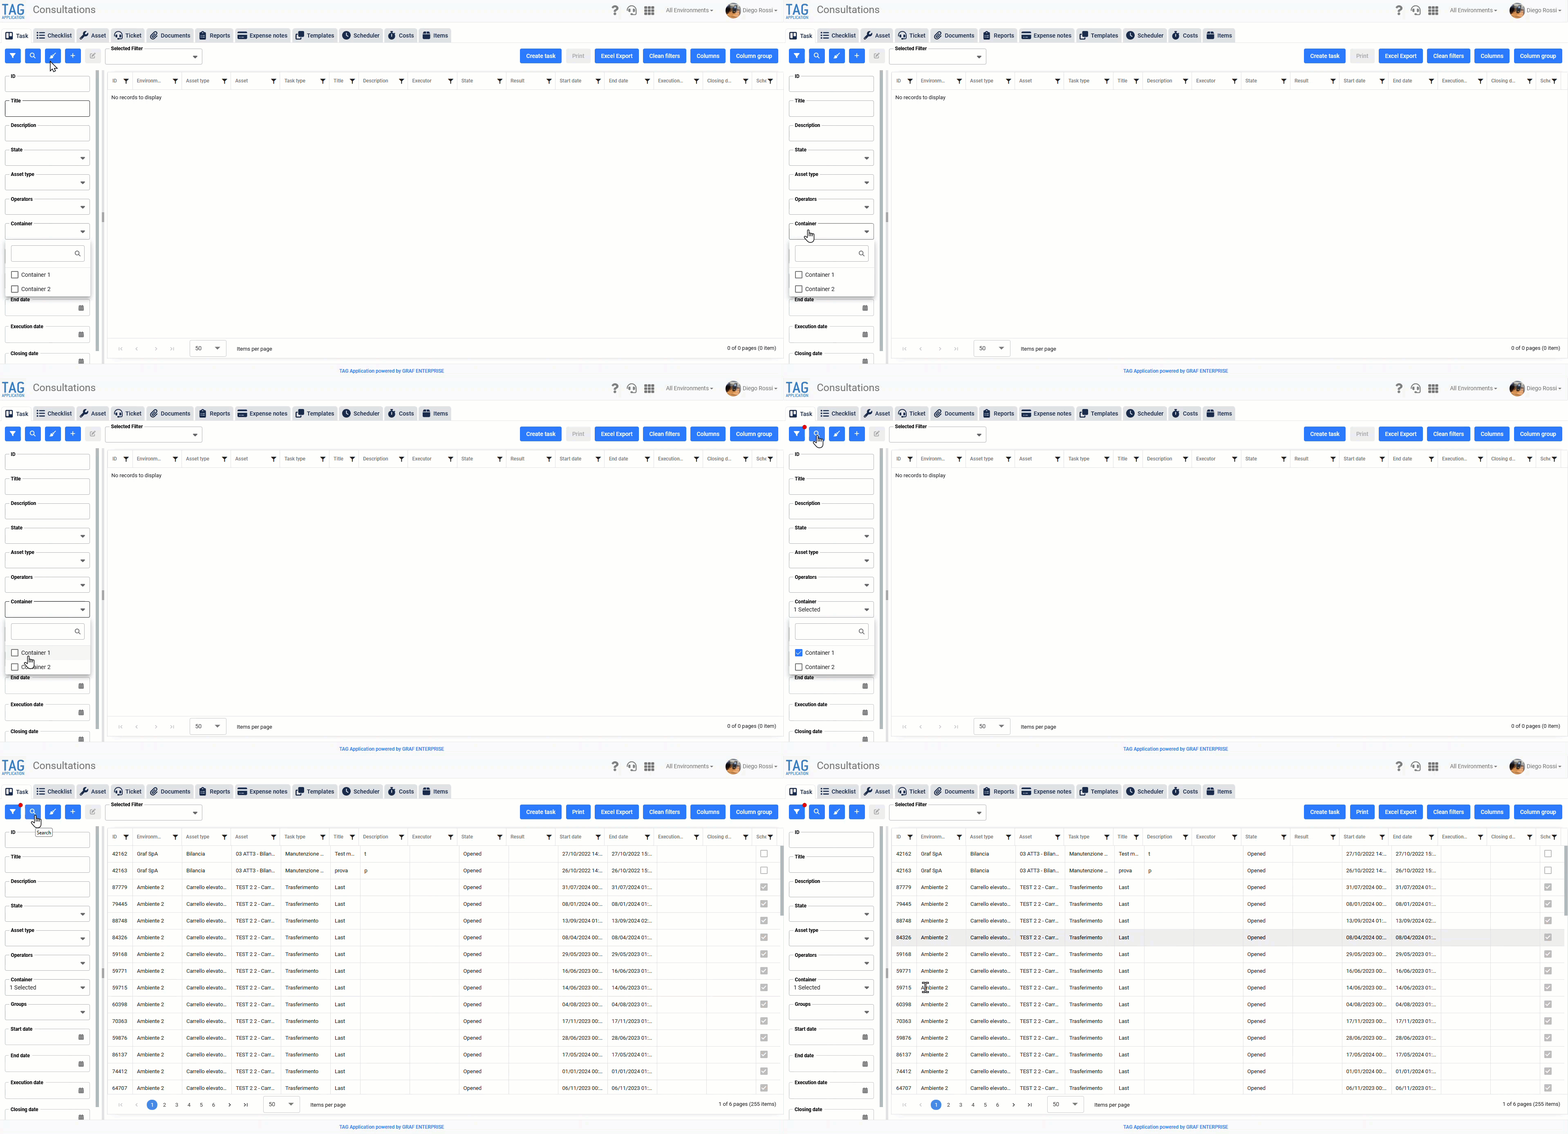
Consultations – New “Container” filter
Search for your personal activities by filtering directly for the “Custom container” in which they were inserted?
Maybe doing it directly from the module Consultations, along with all other activities with the convenient filters already prepared?
Now you can do it!
From the “Activity” section of the consultations it becomes possible to access the “Container” tab, through which you can select all containers created by the logged-in user and search for the activities inserted within them.
The searches, of course, will be combinable with the filters already present in the module, allowing a 360 degree view of all the activities to which the user has permission to access.
(fig 5.0)

Report – deletion from user interface
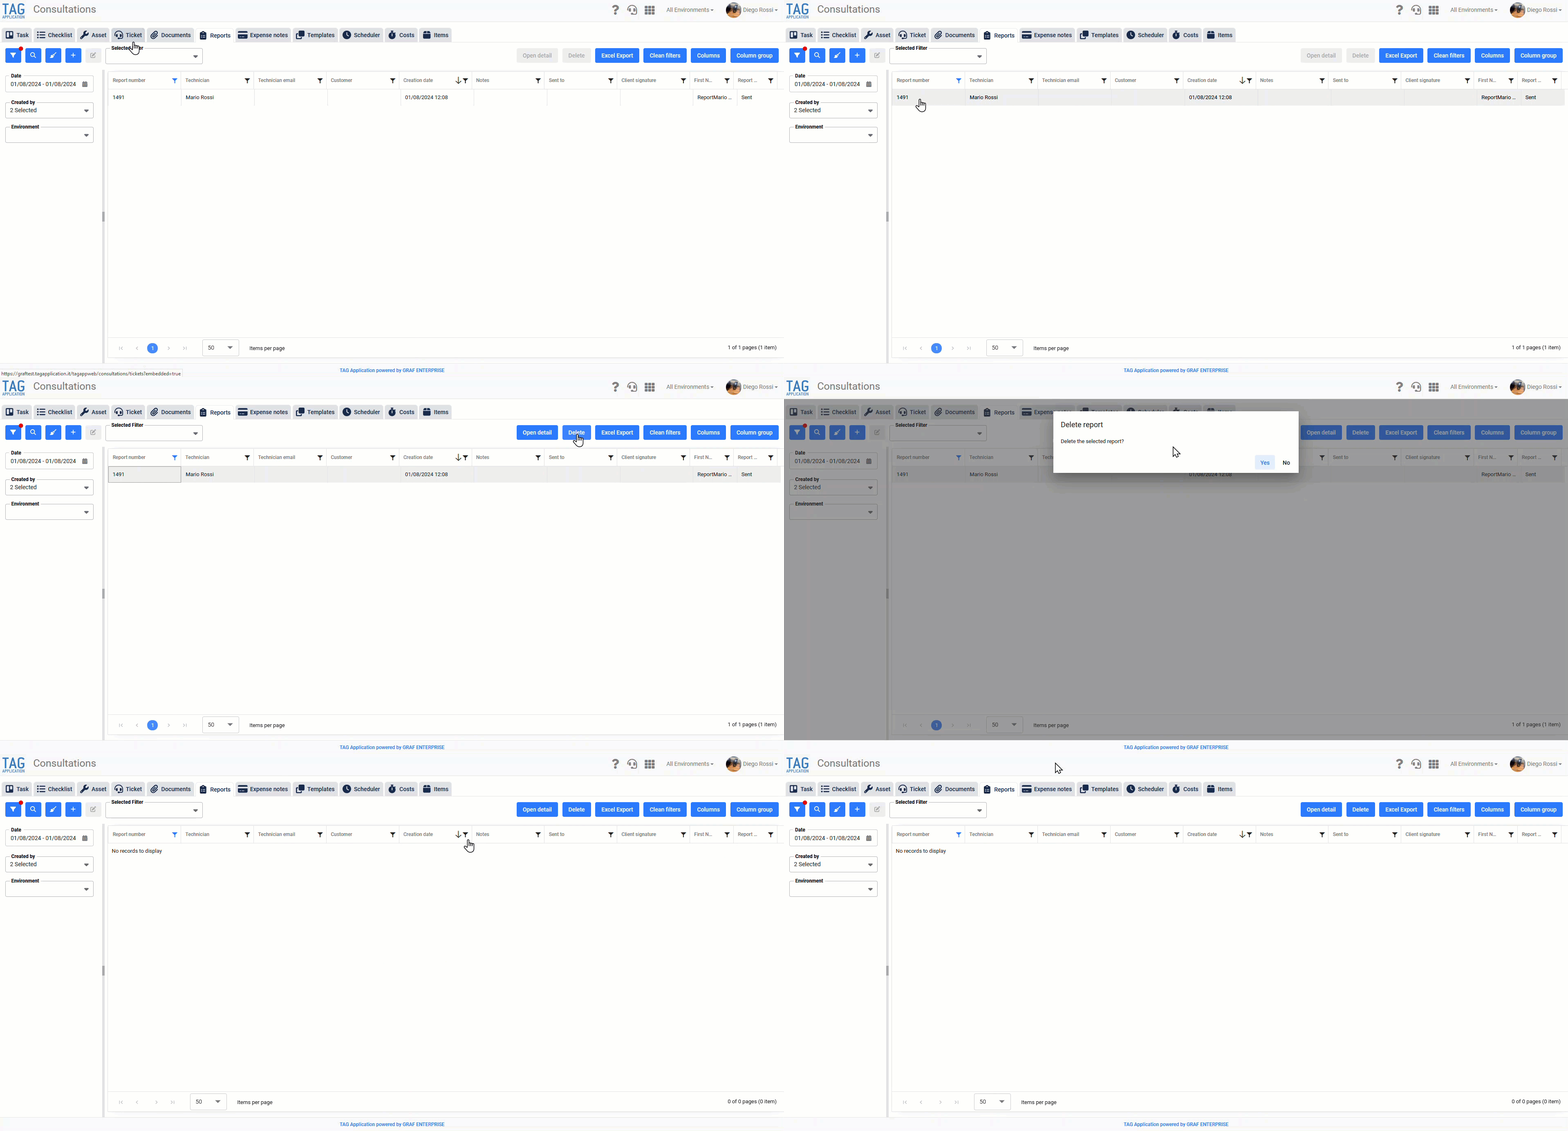
Do you ever make a mistake when making a report and want to delete it without leaving a trace?
With the upcoming version it is now possible to do so: quickly and easily, with a simple click.
Now authorized users, that is administrators or users with the permission to delete, can proceed to delete a report without canceling it, making it disappear permanently from the system.
The deletion of a report can be carried out by selecting one from the appropriate section of the consultations and clicking on the “Delete” button or by accessing from the “Report” tab of a deferred activity and clicking on the trash icon placed on the identification tile of the report that you want to delete.
This operation, for which a final confirmation is always requested, is irreversible and does not allow in any way to retrieve the report in case of errors.
(fig 6.0)

Ticket – Bilateral linkage with tasks
A very common observation that comes naturally to you using TAG Application as your customer care system is:
“Can I create tasks from tickets, but can I also link existing ones?”
“In addition, can you do the reverse? That is to connect a ticket to an activity starting from this one?”
Now we can finally say that the answer is yes!
With the new version, all this becomes reality!
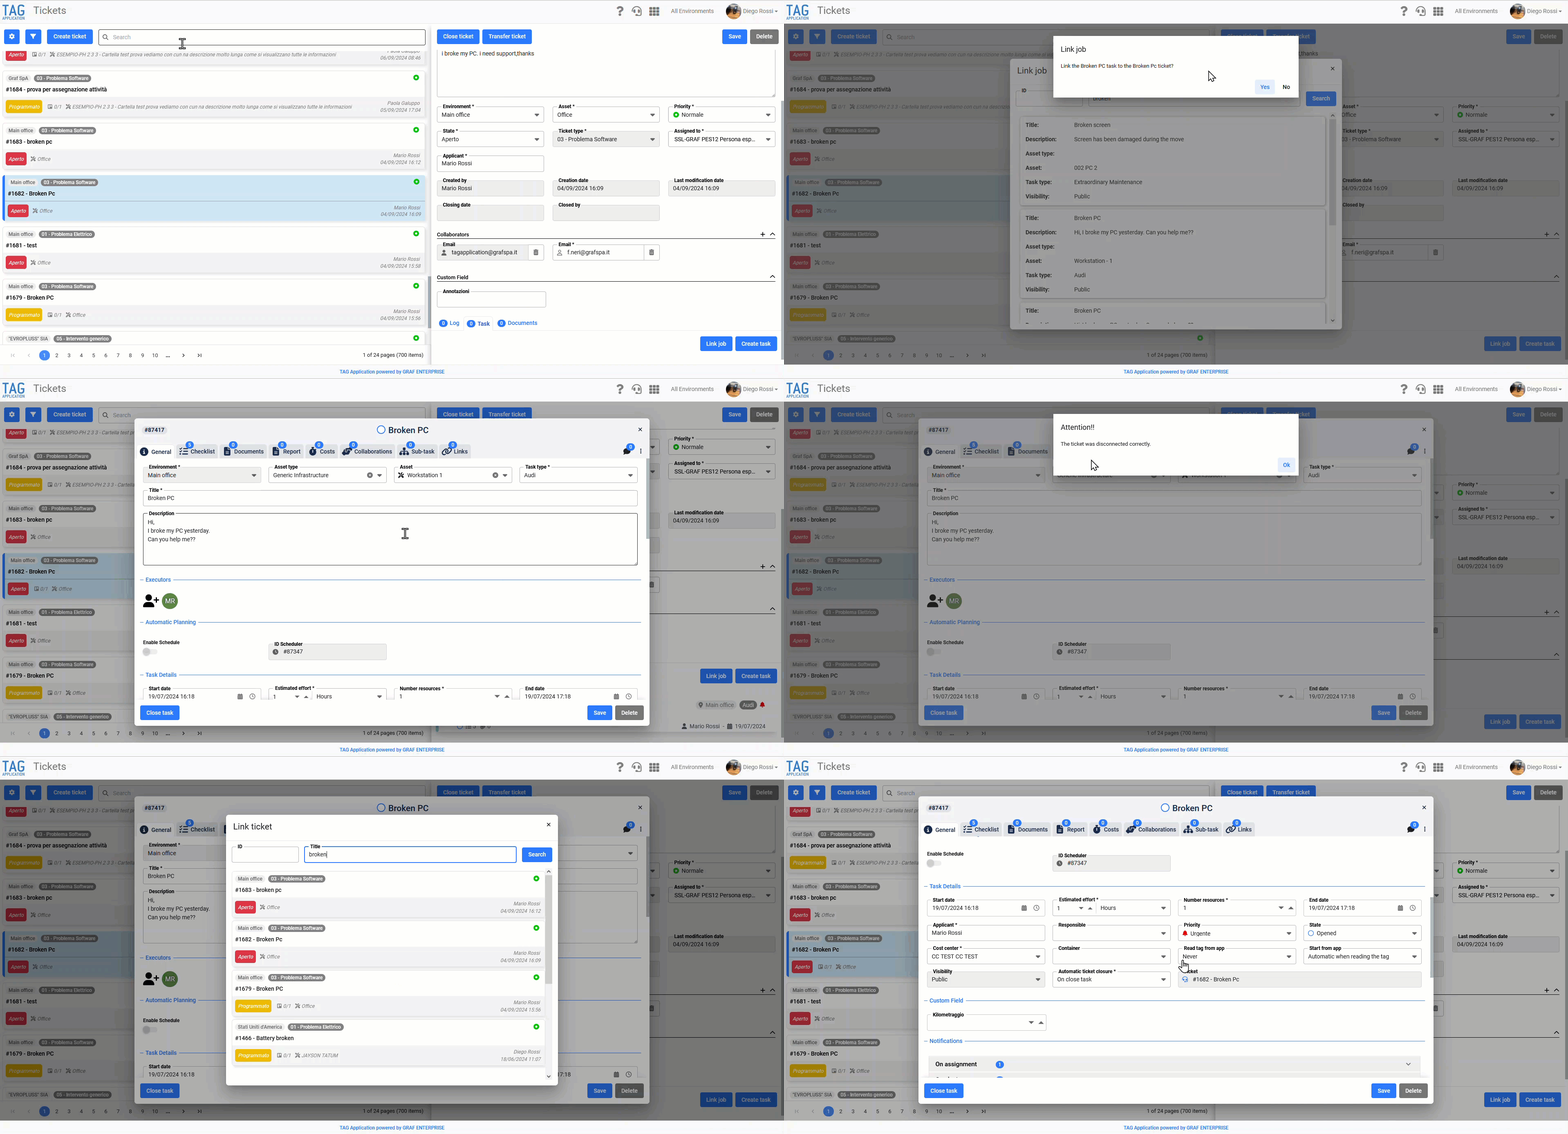
By going to the details of a ticket from the “Activities” section and pressing “Link Activities”, you can now access a convenient interface through which you can search for any activity to link.
Once you enter the ID or title of the activity you want to link, all the corresponding results will be shown, with the possibility to confirm the link by simply clicking on the tile related to the identified activity.
Once the link is established from the ticket, the activity that was just linked will appear in the ticket’s dedicated section.
On the contrary, because bilateral linking, even from any activity will be possible to connect and disconnect tickets.
When you access the context menu of the detail of an activity, in fact, the new command “Link ticket” will be shown. This, just like the corresponding “Link Tasks”, will allow you to access the interface through which to search and link any existing ticket.
If the task is already linked to a ticket, you will find the command “Disconnect ticket” in the context menu , which allows you to disconnect the previously associated ticket.
(fig 7.0)
Ticket – Activation/Deactivation of automation on the managers
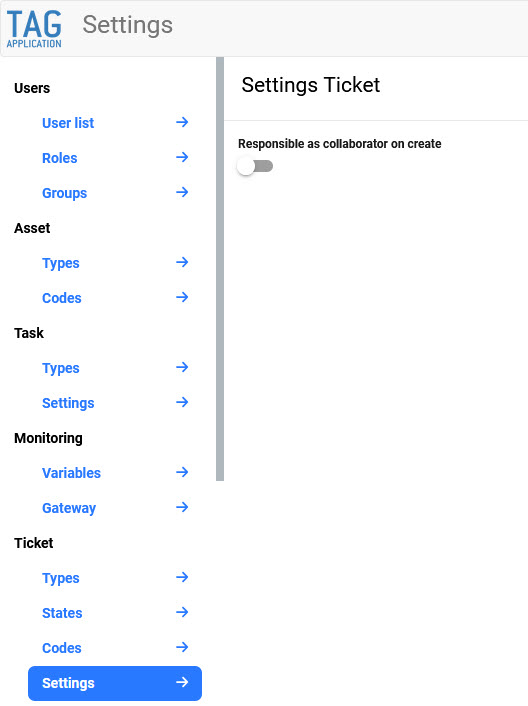
Having your ticket manager automatically copy it when opening tickets is often useful, but may not be in all situations and for all customers.
So it was thought to leave the user the option of choosing whether to use the automatism or not.
With the new version, you can switch on or off the automation as you like simply by turning on a switch.
This selector can be reached from the Settings module (section Ticket – Settings) and, when activated, it allows you to automatically enter the user’s manager who is opening a ticket among the employees of the same.
If the flag is disabled, no contributor will be automatically filled in.
The preference expressed in the settings applies to all users, thus affecting the automation on all tickets, regardless of the applicant.
(fig 8.0)
Monitoring – Management of decommissioned assets
With the new update also on the application are expected news!
The first refers to the Monitoring module, specifically with regard to decommissioned assets.
The latter, in fact, even if with monitored variables, will never be shown in the module Monitoring.
This will allow for greater consistency between app and web (since the second behavior implemented for the application was already present) and a more timely display of information in monitoring, allowing you to choose only active assets, Without the possibility of getting confused by encountering misleading situations.
Asset – New icon for divested monitored assets
As with the previous feature, this was also developed to avoid inconsistencies, aligning the app to the web and simplifying users’ lives.
Now, as in the case of the web, in the tree of the Asset module the monitored infrastructures in the decommissioned state will no longer be represented by the icon of the monitored asset (the antenna), but by that of the decommissioned asset (the ban).